5.14.2012

Surprise!

A couple weeks ago D. showed up from work with these:


My pictures don't do them justice, but they were gorgeous!  He asked if I wanted to go to dinner with him, and of course I said yes! 

We went to this delicious restaraunt called the Euro Bistro and it was so good.  Best.  Food.  Ever.
Plus, the presentation was beautiful.  It really was like artwork on your plate.  Here's our dessert:


And yes, it did taste as good as it looks.

To add to the ambience of the place, they even had a lady dressed in German garb playing the accordian.  It was amazing.  She even came over to our table and played and sang "Zee Eensy Veensy Spider" for Little Man.  He was mesmorized.  She went to each table individually and played something for them.  It was both a little awkward and a lot of fun all at the same time.  Here is a video we "secretly" took while she was playing for another table:


So, there I was thinking that D. just wanted to have some nice German food (because he LOVES everything German...well, almost everything) and in the middle of dinner he said he had snuck a surprise into my purse.  Sneaky, sneaky.

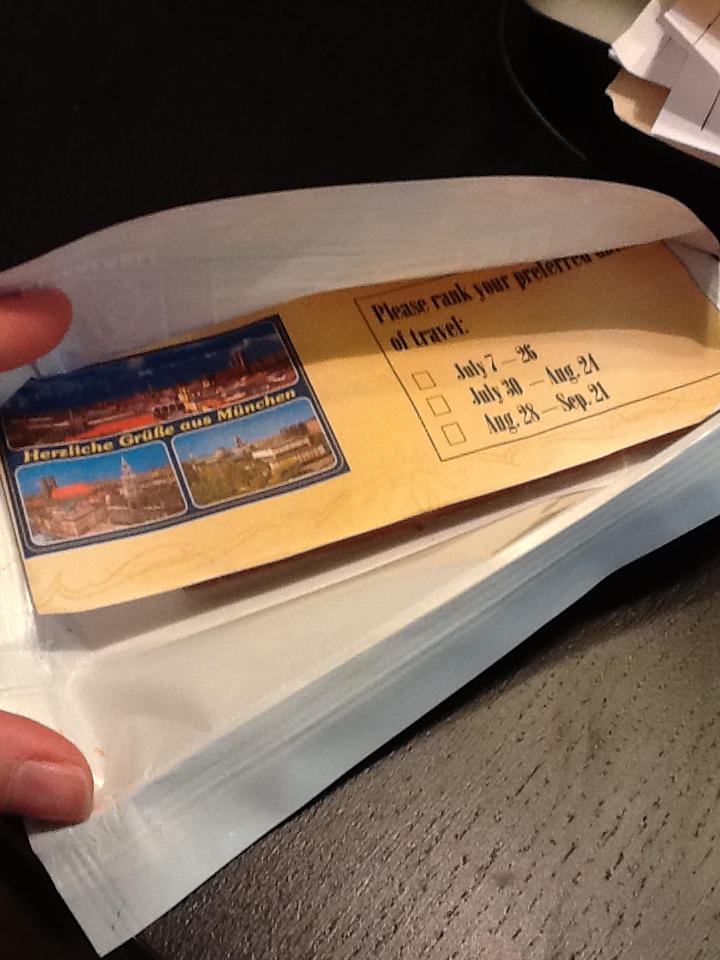
It was a Milka chocolate bar and I should have been suspicious when I saw that it was conveniently in a resealable packaging, but I was oblivious still to what was about to happen.


Am I the only one that wants to sing the "I've got a Golden Ticket!" song from Willie Wonka right about now? 


That's right, folks.  D. got accepted to do a month of German language training IN Germany and we get to go with him!  Munich, here we come!  We'll be heading out later this summer and I'm SO excited! 


My next task: Hit up Pinterest for ideas on how to keep a 2 year old busy on an 8 hour plane ride...


5.10.2012

Date Night Game

I was looking for a fun date night game idea we could do for our anniversary last Monday, but nothing was striking my fancy, so I decided to make one up!  This was SUPER fun and easy to put together.  I created a game board with my paper scraps and I love how it turned out!  


Each colored square represented a stop for our date, and each had a corresponding card of the same color with instructions of what we needed to do at that location.  D. had a lot of fun with this and was so surprised since he thought we were just going to dinner and then coming straight home.   Here's how we played the game:


I just picked places that were close by and that I knew would be fun to go to.  Here's what our evening looked like:

First Stop: HOME DEPOT - Game Piece

Task: Find something under $1 to represent you for the night.  This was fun because we had to actually have a reason behind what we got.

Second Stop: TARGET - Accessorize

Task: Find & purchase something to wear tonight.  D. got a fun watch and I got a bling bling necklace!

Third Stop: EURO BISTRO (quite possibly the BEST German food ever!) - Dinner 

Task: Eat delicious food

Fourth Stop: BEN & JERRY'S - Dessert

Task: Find an ice cream flavor to share.

Fifth Stop: BARNES & NOBLE - Game

Task: Purchase a game to play when we get home.  We love games!


To add another element of fun, we used scrabble tiles and picked letters before each stop.  Then we chose one of these three cards that told us whether we had to use both letters, either letter, or neither of the letters in our task for that location.  It was super fun to try to find something on the menu with both B & O in it...I know, great letter combination.  It was also fun to see D. try to justify what he was getting and how it went along with the letters even if it had nothing to do with them.


We had a great time!   Highly recommend this for a fun date!

5.09.2012

Sweet Treats for my Sweetie

Check out this blog post for the skinny on what I did for our anniversary. 

Here is the list of Sweet Treats I used for our anniversary treat boxes.  They are all delicious and easy too!

 Caramel Apple Heath Dip

Pinned Image

Orange Creamsicle Fudge


Pinned Image

Chocolate Dipped Strawberries


Marshmallow Caramel Popcorn


Pinned Image

White Chocolate Lemon Truffles


Pinned Image


Cookie Dough Dip

Pinned Image

Heart Shaped Cinnamon Rolls

Pinned Image


Anniversary Treats on the Hour

Monday was the three year anniversary of when I married my best friend.
Love this guy!

We take turns planning our anniversary and this year it was my turn.  Because we are going on a Disney Cruise to Alaska at the beginning of June, we decided to do something low-key for our anniversary (although, I did plan a little surprise adventure for us while we're on our cruise...more about that later). 

So I went to the source of all craft/party knowledge and ideas, also known as Pinterest, to find some ideas of what we could do.  Since D. had to work, the first thing I did was inspired by this pin:

I Love You More Than... -- ok, this is an adorable vday/anniversary gift

I customized the cookie sayings to things that pertained to us (i.e. I love you more than...Little Man loves Goldfish.  And believe me...he DOES love his Goldfish!  So much that every time we pass them in Target he yells out "Goldfish!  Bite!")  Then I snuck these fun cookies to someone else who works in the same office and he surprised him with a "special delivery" at work.

Then, I wanted him to have something that would help him get through the work day, so this is what I did.  It started with the idea from this pin:

Anniversary on the Hour idea from @30daysblog.  Treat your loved one to a small gift throughout the day on every hour.

I knew D. was wishing he had the day off, so I surprised him in the morning with a bag full of presents to help him through the day.  I made a bunch of treats that I found on Pinterest and made him a card that looked like a giant cookie with the instructions.  Here's how it turned out:

I got these fun treat boxes at Michael's for a couple of dollars with my 40% off coupon.  Love it!

The boxes all looked the same, so I had to make sure before I wrapped them that I knew which ones had to be put in the fridge for the night before giving them to him the next morning.  It would probably be easier to assemble them in the morning if you do this, but D. goes to work SUPER early, so I didn't want to do it the same day. 

PowerPoint helped me make this.  Insert Shape (Circle), insert shape (little triangles), print.  Awesome.
He had so much fun opening a present every hour.  Who wouldn't love that?  Check out this blog post for the recipes to the treats I made.  They were all delicious!


No Shame: From a Box


I admit it.  I love Jiffy's muffin/pie crust mixes.  Cheap, good variety and easy to use.

Recently I've been experimenting with some different recipes that use these wonderful little mixes as the starter.  My latest love begins with a Blueberry Muffin Mix and becomes a delicious Blueberry Coffee Cake with Struessel Topping.  Yum. 

I usually make this in just an 8" square pan, but this time I decided to try it in my mini loaf pans so I could take some to a friend that wasn't feeling well.  Because we use the mix to start things off, it goes really quicly and you'll have a delicious breakfast in no time that people will ooh and aah about.  Ready?  Here we go.


Now, I have to admit that I actually got this recipe from the side of the Blueberry Muffin Mix box and then added a few changes, so I can't take complete credit for it.  In case you can't read my fuzzy picture with bad lighting, here is the ingredient list:

For the Cake


  • 1 pkg. Jiffy Blueberry Muffin Mix
  • 1/4 cup milk
  • 1 egg
  • 2 T. butter, melted (I used this instead of shortening, because I don't really every cook with shortening...)

For the Struessel Topping


  • 1/4 cup brown sugar
  • 1/4 cup chopped nuts (I like more than this, but this is a good place to start if you're not sure how you feel about nut ratios.)
  • 1 tsp. cinnamon
  • 1 T. baking mix (I use Bisquick because I have it.  Jiffy also makes a mix like that, or I'm sure you could just use flour if you don't have either one.)
  • 1 T. butter, softened (not melted)

DIRECTIONS: Preheat oven to 350...don't forget!

I like to do the struessel topping first so it's ready to go.   Combine all the dry ingredients (brown sugar, chopped nuts, cinnamon and baking mix) in small bowl. 


Mix that all together.


Add softened butter (I accidentally melted mine, and it worked okay, but you're probably better off with just softened butter...) and stir that together until it's crumbly.  Then set it aside.  It's cake time!


In other bowl, combine all the cake ingredients (Muffin Mix, milk, egg & melted butter) and mix it well.


Then pour that in a pan that you have sprayed with cooking spray.  If you're using an 8" pan, just pour it all in.  If you want to do smaller ones, just make sure you don't fill it more than halfway full.  I did mine a little less than halfway and they turned out really well.


Sprinkle struessel topping on top of cake mixture and bake at 350 for about 20 minutes (give or take a few minutes depending on which type of pan you use).  You can check to see if they're done by inserting a toothpick in the middle of one and seeing if it comes out clean.  If it does, they're ready!


I let mine cool in the pan for a bit before trying to pull them out.


Now, wasn't that easy?  Enjoy!


4.24.2012

Red, White & Blue

It's been a very patriotic weekend for me.  First off, I sold another set of my God Bless America blocks from my Etsy shop.  This is one of my favorite things I have on my Etsy. (I just sold another one today!)


But more importantly, one of my friends asked me to help out with her son's Eagle Scout Court of Honor (Congrats, Ben!).  Because it was a Boy Scout event, she decided to do everything in Red, White & Blue and it looked amazing!


My main contribution was 100 patriotic cake balls.  She brought me the supplies and told me I could be as creative as I wanted.  Here's what we came up with.  I was very happy with the finished product and so was everyone else because they were gone before the night was over!


There are a lot of tutorials out there about how to make Cake Balls and there are so many fun ways to decorate them, they are so versatile!  Here's a quick tutorial on how I made these particular ones.

Supplies:

  • Cake Mix (from a box) - I used Lemon and Strawberry for the two different kinds this time.  I will say that the more prominent flavors of both cake and frosting make it more delicious.  I did this once with Funfetti and it looked cool, but didn't taste that great because the cake was just a boring flavor.
  • Tub of Frosting for each cake mix - I used lemon for the lemon cake and vanilla for the strawberry cake.  
  • Chocolate for dipping, or Wilton Candy Melts in the colors you want.
  • Sprinkles
  • Mini Cupcake Liners
Each cake mix makes around 50 balls if you do them the size to fit into the mini cupcake liners like we did with these.

First, you bake the cake as directed on the box.  Easy peasy.  Then let it cool completely.  This is so the frosting won't melt when you mix it in.  I baked my cakes the night before and then the next morning finished them up.  Then you crumble the cake into a bowl.  Make sure it's in little crumbs, not big clumps or your cake balls won't stick together as well.  Then you mix in the frosting.  It can take anywhere from 1/2 to a full container of frosting.  I start with half and then work in more until I get the consistency I want.  It should look something like this.


You don't want it too sticky because you're going to rolling it into balls with your hands, so play around with the texture.  You can always add more frosting if they aren't coming together nicely.

Next, you roll the balls.  I used my cookie dough scoop (definitely worth getting one if you're making a lot of these!) so that my cake balls would all turn out roughly the same size, and it was the perfect size for them to fit into the mini cupcake liners!  Fill up the scoop, scrape it against the side of the bowl to get the extra off, and then plop that into your hand and roll it into a ball.  


You'll want to place them on a wax paper lined cookie sheet.  I used my pizza pan because it fits easier into the freezer.  You can get quite a few on the pan.  Then you freeze them for about 10 - 15 minutes.  This makes it easier when you start dipping them in hot, melted chocolate and they stay formed into balls.  Then after the first batch is done, you can start dipping those while your next batch is freezing.  I'm all about streamlining things!


And yes, that is ironic that I'm using our Healthy Choice meals to hold up balls full of sugar, frosting and delicious cake.  I couldn't help taking a picture of it.

After you have those in the freezer it's time to melt your chocolate!  Using the Wilton Candy Melts, we start with melting it in a microwave on 50% power for about 30 seconds.  Then continue by 30 second intervals, stirring in between each one until it's really melted and nice and smooth.  If you want the chocolate thinner, you can add a little bit of shortening and it thins it right out.  Don't be afraid to stop dipping if your chocolate is firming up and reheat it, because the smoother and thinner it is, the smoother the finished dipping look will be.


Make sure to have your sprinkles and decorations on hand, because as soon as you dip them you'll want to decorate them right then so the sprinkles stick in the still melted chocolate.

The blue "Cake Sparkles" were really fun!  The texture kind of reminded me of fish food and brought back a lot of childhood memories of feeding my little goldfish.  Oh, and just remember that if you get Nonpareils (like the white ones shown) they go EVERYWHERE when you shake them out.  Just a warning.
I tried dipping them and then putting them on a cooling rack, but was having problems getting them off the cooling rack because the chocolate would melt around the rack and the ball would break when I tried to remove it.  I ended up just spraying a cookie sheet with a little cooking spray and then placing them on that after I dipped them.  By the time you are done dipping them, the first ones you did will probably be dry.  GENTLY pull them off the cookie sheets and place them into the cupcake liners and there you go!  Patriotic Cake Balls.


For the ones with stripes, you just put a little bit of melted chocolate into a drizzle bottle (you can get them at Michaels) and go to town on these!  Those were actually my favorite ones and they were the easiest to make!
Hope you enjoy these!  


4.20.2012

Barn Bag

Happy Friday!

So, I've been selling a lot of my Farm Animal Hand Puppets in my Etsy shop recently.

These guys are adorable, if I do say so myself.  My Little Man loves them and I love watching him try to figure out which animal makes which noise as he's playing with them.  He's really good with animal noises now...mostly because his two favorite books right now are both about animals.


Everyone needs a home, including these fun animals, so I looked around and got an idea when I saw THIS barn template from Homemade By Jill.

Here's what I came up with: (sorry for the poor quality picture and bad lighting...)


Maybe I'll start selling these along with my puppets.  After I finish all my other projects I have started, that is...